What to Expect in a Welding Trade Test: The Ultimate Guide
Unlock your potential, overcome test anxiety, and secure your future as a certified welder in the Gulf and beyond. Discover the rigorous procedures, essential checks, and critical evaluations you'll face.
Introduction to the Welding Trade Test
Welding is not merely joining two pieces of metal; it is an art, a highly skilled craft, and an exact science. Whether you are aiming for an international role in the Gulf region, hoping to land a lucrative contract in Europe, or just trying to secure a top-tier position locally, passing your welding trade test is the ultimate gateway to your career.
But what exactly should you expect in a welding trade test? This comprehensive, 6000+ word guide is designed to dissect every single element of the evaluation process. We will uncover the secrets of the evaluation criteria, the intricacies of the practical tasks, the rigorous safety checks, and the post-test inspections. Our goal is simple: to make sure you walk into that testing facility with unparalleled confidence and walk out with a certification in hand.
Why is the Trade Test So Crucial?
Evaluators aren't just looking for a good weld; they're looking for a welder who understands safety, precision, consistency, and metallurgy. One small defect—a microscopic crack, slight porosity, or improper penetration—can mean the difference between passing and failing. If you are serious about your career, you might want to consider our specialized welding preparation courses which perfectly mirror the conditions of the actual test.
Throughout this guide, we will delve into the nuances of different welding processes like Shielded Metal Arc Welding (SMAW), Gas Tungsten Arc Welding (GTAW/TIG), and Gas Metal Arc Welding (GMAW/MIG). We will explore the theoretical and practical dimensions of the test, how to mentally prepare for the high-stakes environment, and precisely how the inspector will scrutinize your final piece using non-destructive testing (NDT) and destructive testing methods.
The Ultimate Pre-Test Preparation Checklist
Preparation is the foundation of success. Walking into a trade test without a rigorous preparation routine is akin to walking into a storm without an umbrella. The evaluators begin grading you the moment you step into the facility. Here is a massive, incredibly detailed checklist of everything you must do before you even touch a stinger or a torch.
1. Personal Protective Equipment (PPE) Mastery
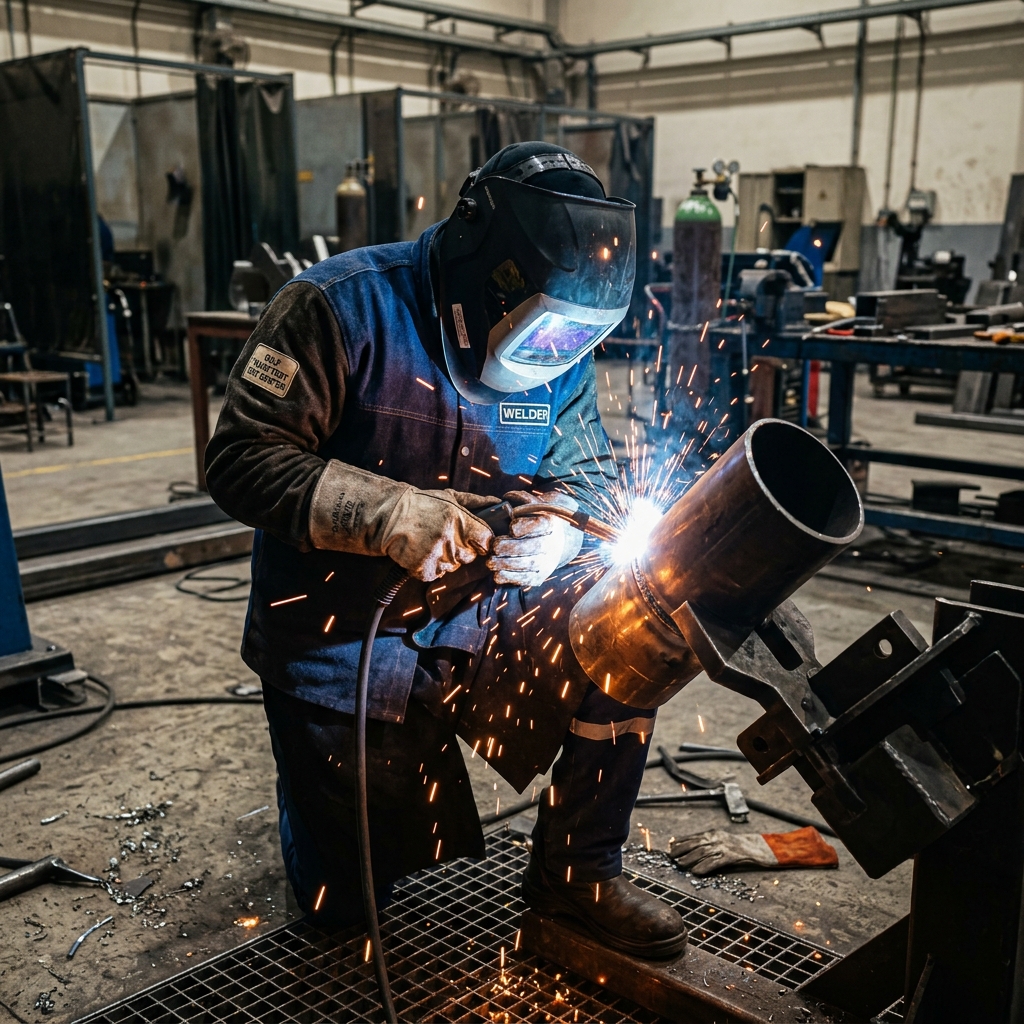
Never underestimate the importance of your gear. If an evaluator sees you with improper PPE, you might be failed before you even strike an arc. Ensure you have the following:
- Auto-Darkening Welding Helmet: Ensure the batteries are charged, the lens is clean, and the shade setting is appropriate for the amperage you will be using (typically shade 10-12 for most SMAW/MIG/TIG tests).
- Fire-Resistant Welding Jacket: A high-quality leather or heavy cotton FR jacket. Absolutely no synthetic materials (like polyester) which can melt into your skin.
- Welding Gloves: Heavy-duty gauntlet gloves for Stick/MIG, and softer, more dexterous kid-skin gloves for TIG.
- Safety Glasses: Must be Z87.1 certified. Worn under your welding helmet at all times.
- Steel-Toe Boots: High-top, slip-on, or lace-up with metatarsal guards to protect against falling slag and heavy plates.
- Hearing Protection: Earplugs or earmuffs, as fabrication shops are loud environments.
Critical Warning: The "Safety First" Trap
Many welders fail not because their weld was poor, but because they neglected basic safety protocols. If you lift your helmet before the slag cools, or handle hot metal with inadequate gloves, the evaluator will mark you down immediately for safety violations. Safety is a non-negotiable metric.
2. Mental and Physical Preparedness
Welding trade tests are high-pressure environments. You will be watched, timed, and scrutinized.
- Hydration and Rest: A steady hand requires a rested body. Dehydration leads to muscle tremors. Drink plenty of water and get at least 8 hours of sleep the night before.
- Visualize the Process: Mental rehearsal is a technique used by top athletes and welders alike. Visualize the puddle, the travel speed, and the rod angle.
- Familiarize Yourself with the WPS (Welding Procedure Specification): The WPS is your bible during the test. It dictates the base metal, filler metal, amperage, voltage, polarity, and positions. Ignoring the WPS is an automatic failure.
Need help deciphering complex WPS documents or dialing in your technique? Enroll in one of our comprehensive welder certification courses to ensure you are 100% prepared.
A Step-by-Step Walkthrough of the Testing Process
To dispel the fear of the unknown, let us take a microscopic look at exactly what happens from the moment you sign in to the moment the inspector hands down their verdict. Every testing facility has its variations, but the core structure of a professional welding trade test remains remarkably consistent.
The Briefing and WPS Review
Upon arrival, you will undergo a safety briefing and be handed your Welding Procedure Specification (WPS) and the mechanical drawings of the test coupon. You must review these documents meticulously. The WPS will outline the joint design, base metal thickness, required welding positions (e.g., 1G, 2G, 3G, 4G, 6G), filler metal classifications, and allowable electrical parameters. Do not be afraid to ask questions during this phase. Clarifying a doubt now is vastly better than making a fatal error later.
Material Preparation and Fit-Up
You will be provided with test plates or pipes. Often, these are pre-beveled, but sometimes you are required to grind the bevels yourself. This is where your fabrication skills are tested.
- Cleaning: Use a wire brush or grinder to remove all mill scale, rust, and oils from the weld zone. A clean base metal is crucial for preventing porosity.
- Root Gap and Land: Set your root gap and root face (land) exactly to the WPS specifications. A gap that is too wide leads to burn-through; too tight leads to lack of penetration.
- Tacking: Place strong, evenly spaced tack welds. Ensure your tacks are feathered with a grinder so your root pass can consume them seamlessly.
Note: The evaluator will almost certainly inspect your fit-up before allowing you to proceed. Do not strike an arc on the actual joint until you have the green light.
Machine Setup and Calibration
You are responsible for setting up your welding machine. Check the polarity (DCEP, DCEN, or AC) as dictated by the WPS. Grab some scrap metal of the same thickness and run a few practice beads. This allows you to dial in your amperage or voltage and ensures the machine is functioning properly. Never skip this step.
The Root Pass
The root pass is the most critical part of any weld test, particularly in pipe welding (like a 6G test). If the root fails, the entire weld fails.
You must achieve complete joint penetration (CJP) with adequate reinforcement on the inside of the pipe or back of the plate. Too much heat will cause "suck back" or excessive penetration (icicles). Too little heat or improper rod angle will cause incomplete penetration. Evaluators will often inspect the root pass before you are allowed to proceed to the hot pass.
The Hot Pass, Fill, and Cap
After a successful root pass, you will proceed to the hot pass to burn out any trapped slag and tie the root solidly to the side walls. Subsequent fill passes must be carefully layered to avoid trapping slag (especially in SMAW and FCAW).
Finally, the cap pass (cover pass) must be visually appealing. It should be uniform, free of undercut, and should not exceed the maximum allowable reinforcement height (usually 1/8 inch or 3mm).
Struggling with the 6G Pipe Test?
The 6G position is notoriously difficult as it requires welding in all positions around a fixed 45-degree angle pipe. Our Advanced Pipe Welding Course provides dedicated hands-on training for the 6G test.
Process-Specific Expectations: TIG, MIG, and SMAW
The specific welding process you are tested on will vastly change the dynamics of the evaluation. Evaluators look for different hallmarks of quality depending on whether you are running Stick, MIG, or TIG. Let us break down the specific expectations for each major process.
SMAW (Stick Welding)
Shielded Metal Arc Welding is the most common test for structural and heavy pipe welding. Evaluators will closely monitor your rod angle and arc length.
- Restrikes: They will look at how you handle tie-ins. A cold tie-in with trapped slag is an immediate fail.
- Slag Removal: Thoroughly clean every pass. Trapped slag is the #1 reason for failing an X-ray test.
- Undercut: Particularly on the 3G (vertical up) and 4G (overhead) positions, ensure you pause on the toes to prevent undercut.
GTAW (TIG Welding)
Gas Tungsten Arc Welding demands extreme precision and cleanliness. It is commonly used for root passes on pipes and for exotic metals like stainless steel or aluminum.
- Cleanliness: If the metal isn't surgically clean, impurities will float in the puddle and ruin the weld.
- Tungsten Contamination: Dipping the tungsten into the puddle or touching it with the filler rod is heavily penalized. If you dip, you MUST stop and regrind your tungsten.
- Gas Coverage: Ensure proper cup size and gas flow rates to avoid oxidation (sugaring), especially on stainless steel roots.
GMAW / FCAW (MIG/Flux-Core)
Gas Metal Arc Welding and Flux-Cored Arc Welding are known for high deposition rates. However, they are highly prone to specific defects if not handled correctly.
- Cold Lap (Lack of Fusion): In GMAW (especially short-circuit transfer), it is easy to lay down a pretty bead that isn't actually fused to the base metal. Maintain the leading edge of the puddle.
- Porosity: Loss of shielding gas due to drafts or improper gun angle will cause severe porosity.
- Stick-out: Maintaining a consistent contact-tip-to-work distance (stick-out) is critical for stable voltage/amperage in wire-fed processes.
Common Mistakes that Lead to Instant Failure
Despite rigorous preparation, many welders fall prey to nerves and make uncharacteristic errors during the test. Understanding these common pitfalls will help you avoid them when the pressure is on. Here is a definitive list of mistakes that will almost certainly result in an instant failure.
| The Mistake | The Consequence | How to Avoid It |
|---|---|---|
| Ignoring the WPS | Immediate Disqualification | Read the WPS three times. Verify your machine settings against the WPS on a piece of scrap before touching the test coupon. |
| Arc Strikes Outside the Weld Zone | Visual Inspection Failure | Always strike your arc within the joint. Stray arc strikes create micro-fractures in the base metal. |
| Poor Tie-Ins / Stops and Starts | X-Ray / Bend Test Failure | Stagger your starts and stops. Feather your stops with a grinder to ensure a clean, smooth tie-in on the next rod. |
| Inadequate Slag Removal | Slag Inclusion (NDT Failure) | Use a chipping hammer and a wire wheel aggressively between every single pass. Do not weld over slag. |
| Excessive Reinforcement (Too High) | Visual Inspection Failure | Ensure your cap pass does not exceed the maximum allowed height (usually 1/8"). Turn up heat slightly or increase travel speed. |
A Note on Destructive Testing (The Bend Test)
If you pass the visual inspection, your coupon will likely be subjected to a bend test or an X-ray (Radiographic Testing). In a bend test, the coupon is cut into strips and bent in a U-shape. If there are any flaws—lack of fusion, porosity, or slag inclusions—the metal will crack open. The only way to pass a bend test is to have perfectly fused, flawless weld metal throughout the entire joint.
Want to test your skills before the real thing? Book a mock trade test session through our training center to experience a true-to-life evaluation.
Frequently Asked Questions
How long does a welding trade test usually take?
Depending on the complexity of the test (e.g., a simple 3G plate vs. a 6G pipe), the test can take anywhere from 2 to 6 hours. Evaluators often impose strict time limits, so time management is critical.
Can I bring my own welding machine?
No. You will be required to use the machines provided by the testing facility. This tests your ability to adapt to unfamiliar equipment. You should, however, bring your own personal protective equipment (PPE) like your helmet, jacket, and gloves.
What happens if I fail the visual inspection?
If you fail the visual inspection (due to excessive undercut, porosity, wrong weld size, or stray arc strikes), the test ends immediately. Your coupon will not proceed to the X-ray or bend test phase, and you will be marked as a failure.
Is grinding allowed during the test?
This strictly depends on the WPS and the evaluator's rules. Often, grinding is allowed for preparing the root and cleaning between passes (like removing slag), but grinding the final cap pass is almost universally prohibited.
How can I practice for a 6G pipe test?
The best way is under the supervision of a certified instructor who can identify your flaws before they become habits. We highly recommend enrolling in our specialized training programs available in the courses section.
Ready to Prove Your Skills?
Don't let the trade test stand between you and your dream career. Let us help you refine your skills and master the testing environment.
Enroll in a Prep Course Today
How to Pass a Trade Test Successfully (Complete Guide)
July 28th, 2026
Trade Test Questions and Answers for Gulf Jobs
July 28th, 2026
Complete Trade Test Preparation Checklist
July 28th, 2026
What to Expect in a Welding Trade Test
July 28th, 2026
Top Skills Required for Plumbing Trade Test
July 28th, 2026